 Pin It
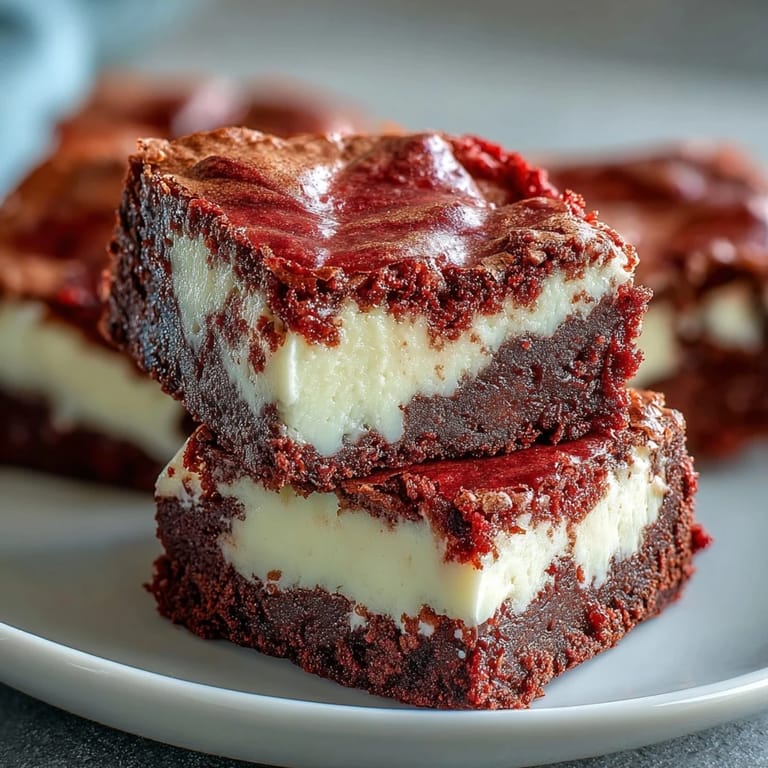
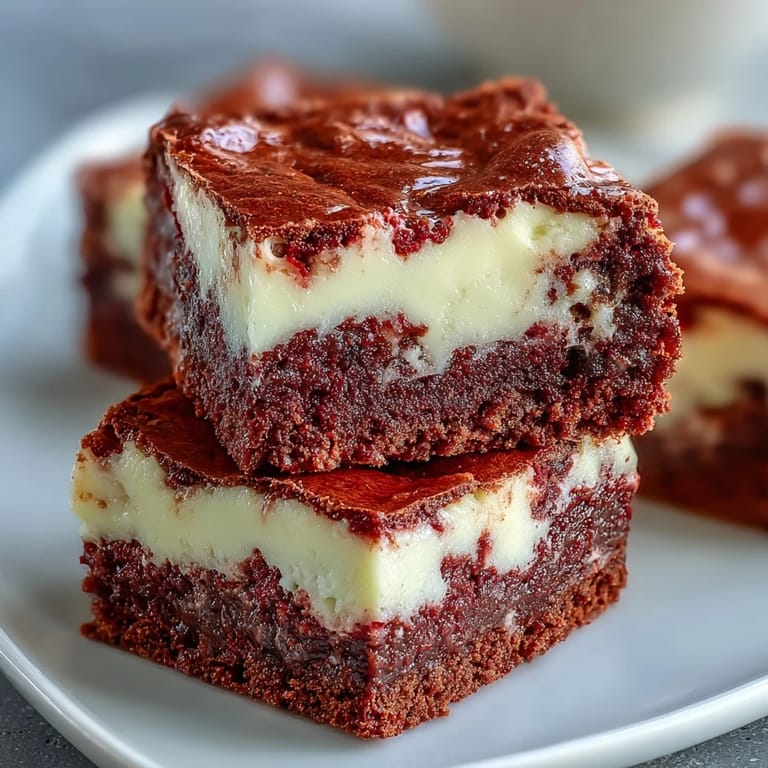
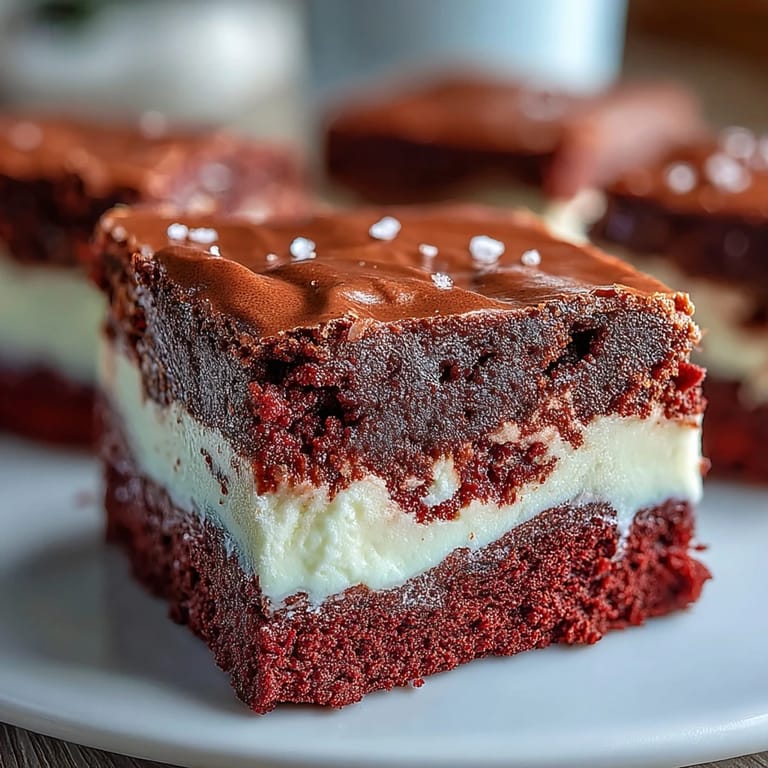
 My neighbor knocked on my door one Saturday holding an empty plate and asking if I still had that recipe. She'd served these brownies at her book club and apparently caused a minor uprising when she refused to make a second batch on the spot. The red velvet swirl catches people off guard every time, that pop of crimson against creamy white cheesecake. I'd stumbled onto this combination after a Valentine's party where I had leftover cream cheese and a bottle of red food coloring I didn't know what to do with. Now I make them whenever I need something that looks as dramatic as it tastes.
I brought these to a potluck once and watched three people argue over the last piece. One claimed she'd brought the salad so she deserved it, another said he drove the farthest, and the third just quietly ate it while they debated. The contrast between the tangy cream cheese and the soft cocoa crumb is what does it, that and the way the red velvet doesn't taste like chocolate but somehow still feels decadent. My sister now requests them every Christmas, and I've learned to double the batch because they vanish faster than I ever expect.
Ingredients
- Unsalted butter: Melted butter blends smoothly into the batter and keeps the brownies fudgy without making them greasy.
- Granulated sugar: White sugar gives you that shiny crackled top and helps the cheesecake layer set just right.
- Eggs: Room temperature eggs incorporate faster and create a smoother texture in both layers.
- Vanilla extract: A little in each layer deepens the flavor and makes the whole pan smell like a bakery.
- Red food coloring: Gel coloring works better than liquid because it won't thin out your batter.
- All-purpose flour: Just enough to hold the brownies together without turning them cakey.
- Unsweetened cocoa powder: This adds the subtle chocolate backbone that makes red velvet recognizable.
- Cream cheese: Softened completely so you don't end up with lumps in your cheesecake swirl.
Tired of Takeout? 🥡
Get 10 meals you can make faster than delivery arrives. Seriously.
One email. No spam. Unsubscribe anytime.
Instructions
- Get your oven ready:
- Preheat to 175°C and line your pan with parchment, letting the edges hang over like little handles. You'll thank yourself later when you lift the whole slab out in one piece.
- Mix the red velvet base:
- Whisk melted butter and sugar until it looks glossy, then beat in eggs, vanilla, and that bright red coloring until everything's evenly tinted. Sift in your dry ingredients and fold gently, stopping the second you don't see any more flour streaks.
- Reserve some batter:
- Scoop out a quarter cup of the red velvet mix and set it aside in a small bowl. Spread the rest into your prepared pan, smoothing it into the corners with a spatula.
- Whip up the cheesecake layer:
- Beat the cream cheese until it's completely smooth and fluffy, then add sugar, egg, and vanilla. Mix until the whole thing is creamy and there's not a single lump hiding in there.
- Layer and swirl:
- Pour the cheesecake mixture over the brownie base and spread it gently to the edges. Drop spoonfuls of that reserved red velvet batter on top, then drag a knife through in looping motions to create marbled swirls.
- Bake until just set:
- Slide the pan into the oven for 35 minutes, checking that the center barely jiggles and a toothpick comes out with moist crumbs. Let it cool completely on a wire rack, then refrigerate for at least two hours before slicing into squares.
 Pin It
 The first time I served these at a family dinner, my aunt asked if I'd ordered them from a fancy bakery downtown. When I told her I'd made them in my regular kitchen with a hand mixer, she didn't believe me until I showed her the photos on my phone. There's something about the swirled top that makes people assume you spent hours on technique, when really it's just a few lazy figure eights with a butter knife. That's the magic of this recipe, it tricks everyone into thinking you're more skilled than you actually are.
How to Get Perfect Swirls
Don't overthink the swirling part or you'll blend the layers into a muddy mess. I learned this after turning my first batch into solid pink brownies because I got too enthusiastic with the knife. Three or four gentle swoops in different directions is all you need. The batter will spread a little more as it bakes, finishing the marbling for you. If you mess up, just dollop a little more red velvet on top and try again, nobody will know it's your second attempt.
Storage and Make-Ahead Tips
These brownies actually taste better the next day after the flavors have had time to settle into each other. I usually make them the night before I need them and keep the pan covered in the fridge. They'll stay moist and fudgy for up to five days if you store them in an airtight container, though I've never had a batch last that long. You can also freeze individual squares wrapped in plastic wrap and stacked in a freezer bag for up to three months, then thaw them in the fridge overnight whenever a craving hits.
Variations Worth Trying
I've added white chocolate chips to the red velvet batter when I'm feeling extra indulgent, and they create little pockets of sweetness that melt into the fudgy crumb. A friend of mine swears by mixing mini chocolate chips into the cheesecake layer for added texture. You can also swap the red food coloring for green or blue if you're making these for a holiday and want to match a theme, though I'll admit red velvet just hits different.
- Sprinkle the top with white chocolate shavings right after baking for a fancy finish.
- Add a teaspoon of espresso powder to the brownie batter to deepen the chocolate flavor.
- Drizzle cooled squares with cream cheese frosting thinned out with a little milk.
 Pin It
 Every time I pull these out of the oven, I'm reminded that some of the best recipes happen by accident when you're just trying to use up leftovers. Keep a batch in your back pocket for when you need to impress someone without spending all day in the kitchen.
Questions & Answers
- → Can I use natural food coloring instead of artificial dye?
Yes, you can use natural red food coloring, though the color may be less vibrant. Beet powder is a popular natural alternative, but you may need to adjust the quantity to achieve your desired shade.
- → Why do my brownies need to be refrigerated before cutting?
Refrigerating allows the cheesecake layer to set completely, making clean cuts easier. The cold temperature also enhances the fudgy texture and prevents the layers from separating when sliced.
- → Can I make these brownies ahead of time?
Absolutely! These brownies actually taste better the next day as the flavors meld together. Store them in an airtight container in the refrigerator for up to 5 days, making them perfect for party prep.
- → What's the best way to create the swirl pattern?
After dolloping the reserved red velvet batter on top, use a butter knife or wooden skewer to gently drag through both layers in a figure-8 motion. Avoid over-swirling to maintain distinct color contrasts.
- → How do I know when the brownies are done baking?
The center should be just set with a slight jiggle, and a toothpick inserted should come out with a few moist crumbs—not wet batter. Overbaking will dry out the fudgy texture.
- → Can I freeze these brownies?
Yes, wrap individual squares tightly in plastic wrap, then place in a freezer-safe container. They'll keep for up to 3 months. Thaw in the refrigerator overnight before serving.