 Pin It
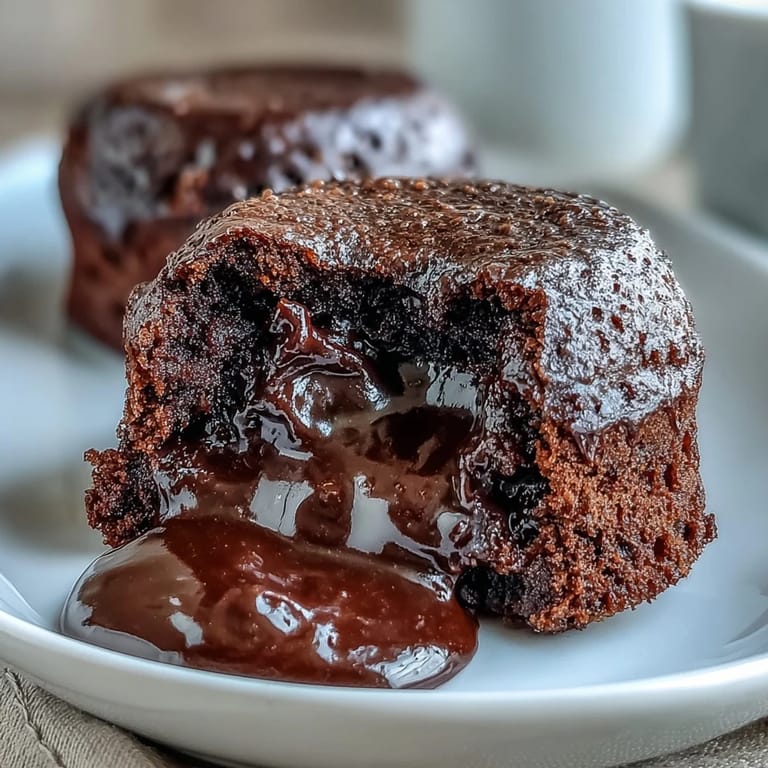
 The first lava cake I ever made cracked open on the plate and nothing flowed out. I had overbaked it by two minutes, and instead of molten chocolate, I got a very nice, very solid cake. My dinner guest laughed, I shrugged, and we ate it anyway with ice cream. The next time, I set a timer, hovered by the oven, and when that glossy center spilled onto the plate, I felt like I had unlocked a secret level in dessert making.
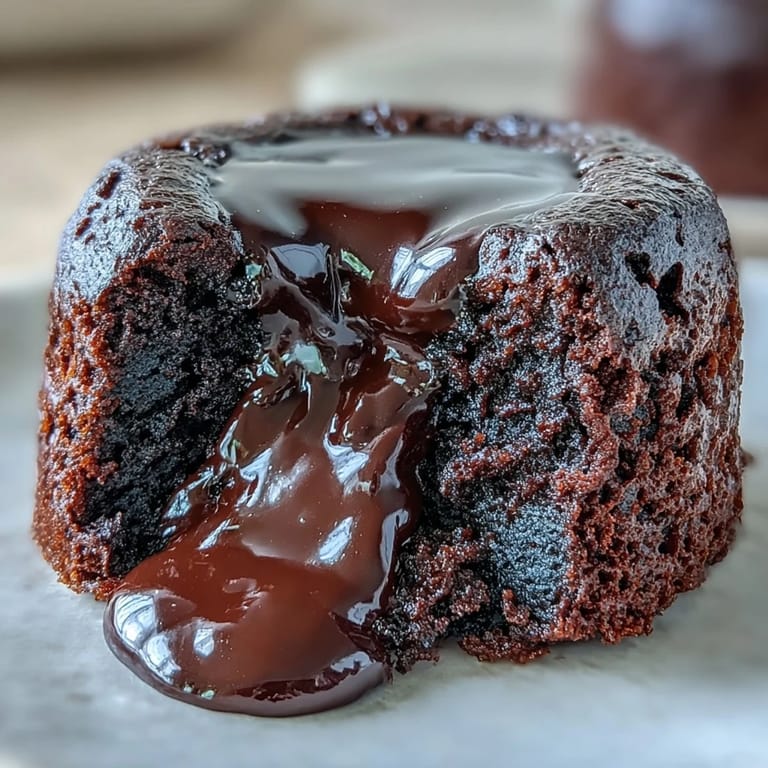
I made these for a small dinner party once, and when I inverted the first ramekin, the cake stuck. I panicked, tapped the bottom, and it finally released with a soft thud. The center oozed out perfectly, and my friend gasped like I had just performed magic. I didnt tell her I had been holding my breath the whole time. That moment taught me that even when you doubt yourself, the cake usually knows what its doing.
Ingredients
- Bittersweet or semisweet chocolate: This is the soul of the cake, so use a chocolate you would actually enjoy eating on its own, something with at least 60% cocoa for depth.
- Unsalted butter: It melts into the chocolate to create that silky, rich base, and using unsalted lets you control the seasoning with just a pinch of salt later.
- Eggs and egg yolks: The yolks add richness and help create that custardy, molten center, while the whole eggs give structure so the edges set up beautifully.
- Granulated sugar: It sweetens and also helps the eggs whip up pale and thick, which traps air and gives the cakes a light crumb around the gooey middle.
- All purpose flour: Just a small amount to give the batter barely enough structure to hold its shape, but not so much that it becomes cakey.
- Instant espresso powder: It does not make the cake taste like coffee, it just amplifies the chocolate and adds a subtle warmth that lingers on your tongue.
- Pure vanilla extract: A little vanilla rounds out the flavors and makes everything smell incredible as it bakes.
- Pinch of salt: It balances the sweetness and makes the chocolate taste more like itself, brighter and more defined.
Tired of Takeout? 🥡
Get 10 meals you can make faster than delivery arrives. Seriously.
One email. No spam. Unsubscribe anytime.
Instructions
- Prep the ramekins:
- Preheat your oven to 220°C (425°F). Grease four ramekins generously with butter, then dust them with cocoa powder and tap out the excess so the cakes release cleanly later.
- Melt the chocolate and butter:
- Set a heatproof bowl over a pan of simmering water and melt the chocolate and butter together, stirring until smooth and glossy. Remove from heat and let it cool slightly so it does not scramble the eggs.
- Whisk the eggs and sugar:
- In a separate bowl, whisk the eggs, egg yolks, and sugar together for about 2 to 3 minutes until the mixture is pale, thick, and falls in ribbons from the whisk.
- Add espresso and vanilla:
- Stir the espresso powder and vanilla extract into the cooled chocolate mixture until fully dissolved and fragrant.
- Combine chocolate and eggs:
- Gently fold the chocolate mixture into the egg mixture, using a spatula and a light hand so you do not deflate all that air you just whipped in.
- Fold in flour and salt:
- Sift the flour and salt over the batter and fold gently until just combined, stopping as soon as you do not see any dry streaks.
- Fill the ramekins:
- Divide the batter evenly among the prepared ramekins, filling them about three quarters full.
- Bake:
- Place the ramekins on a baking sheet and bake for 11 to 13 minutes, until the edges are set and puffed but the centers still jiggle slightly when you gently shake the pan.
- Invert and serve:
- Let the cakes rest for 1 minute, then run a thin knife around the edges to loosen. Invert each ramekin onto a dessert plate, tap the bottom gently, and lift away to reveal the cake.
 Pin It
 The best part is that moment right after you invert the cake, when you lift the ramekin and see the glossy dome sitting there, and then you break into it with a spoon and the molten center spills out. I have served these to friends who normally skip dessert, and they always scrape the plate clean. It is not just chocolate, it is a little bit of wonder on a weeknight.
Serving Suggestions
A scoop of cold vanilla ice cream melting into the warm chocolate is the classic move, but whipped cream with a splash of bourbon or a dusting of flaky sea salt works beautifully too. I have also served them with fresh raspberries on the side, and the tartness cuts through the richness in a way that feels almost elegant. If you want to go all out, a drizzle of salted caramel or a few toasted hazelnuts scattered on top turns this into something you would pay too much for at a restaurant.
Make Ahead and Storage
You can prepare the batter up to four hours ahead, pour it into the greased ramekins, cover them with plastic wrap, and refrigerate until you are ready to bake. Just remember to pull them out about 20 minutes before baking so they come closer to room temperature, or the centers will not cook evenly. These cakes are best served immediately, but if you have leftovers (unlikely), you can gently reheat them in the microwave for about 15 seconds, though the molten center will not be quite as dramatic the second time around.
Variations and Tweaks
If you want a more intense coffee flavor, bump the espresso powder up to 1 and a half teaspoons or even fold in a tablespoon of finely ground espresso beans for texture. You can also tuck a square of dark chocolate or a spoonful of Nutella into the center of each ramekin before baking for an extra molten surprise. For a boozy twist, add a tablespoon of Kahlua or dark rum to the chocolate mixture, or swap the vanilla for almond extract if you are feeling adventurous.
- Try adding a pinch of cinnamon or cayenne to the batter for warmth and a subtle kick.
- Use white chocolate instead of dark and skip the espresso for a sweeter, milder version.
- Top with a few fresh mint leaves or a sprig of rosemary for an unexpected aromatic touch.
 Pin It
 These little cakes have become my go to when I want to feel like I know what I am doing in the kitchen, even on days when I absolutely do not. They are quick, they are forgiving, and they always deliver that moment of quiet awe when the chocolate spills out onto the plate.
Questions & Answers
- → How do I know when the lava cakes are perfectly baked?
The edges should be firm and set while the centers remain soft and jiggly. Look for slight pulling away from the ramekin sides, typically after 11-13 minutes at 425°F.
- → Can I make the batter ahead of time?
Yes, prepare the batter and fill the ramekins, then refrigerate for up to 4 hours. Bring to room temperature for 15-20 minutes before baking for best results.
- → What type of chocolate works best?
Use high-quality bittersweet or semisweet chocolate with 60-70% cacao content. The better the chocolate quality, the richer and more intense your molten center will be.
- → Why did my lava cakes turn out fully cooked inside?
Overbaking is the most common issue. Reduce baking time by 1-2 minutes, and remember the centers should still look slightly underdone when you remove them from the oven.
- → Can I use regular coffee instead of espresso powder?
Espresso powder is preferred as it dissolves easily and provides concentrated flavor without adding moisture. If using brewed coffee, reduce liquid elsewhere or use very strong espresso.
- → How do I prevent the cakes from sticking to the ramekins?
Generously butter the ramekins and dust with cocoa powder, ensuring all surfaces are coated. Let cakes rest for 1 minute after baking before inverting for cleanest release.